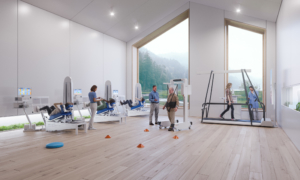
Therapy Session

Q&A

What are the Indications and Contraindications for Andago Therapy?

Q&A

How Should I Optimize the Fall Limit for Andago Training?

Definition

At its core, the fall limit is a way to customize the training for your patient. During gait, balance and step-up exercises, the patient’s center of mass moves vertically and with the fall limit you can adjust the allowable range of vertical displacement.

Figure 1: Default fall limit. Patients can move downward 7 cm for physiological gait or go over a step or obstacle up to 13 cm in height.

Figure 2: High fall limit. Patients can perform balance exercises and move downward up to 20 cm.


The fall limit can be adjusted by either pressing and holding the default fall limit button or by pressing the lift button to achieve the desired position.

NOTE: If the body weight support (BWS) is set to 0, adjusting the fall limit is not possible.

Why Adjust the Fall Limit?

Adjust the fall limit to give your patient flexibility in his training depending on his therapy goal.

  • For gait and step training, use the default fall limit (suspension carrier arrow at the dot in Figure 3). The default fall limit allows your patient to safely displace himself downward 7 cm and upward 13 cm.
Figure 3: Default fall limit. Adequate for physiological gait. Press and hold the default fall limit button until the arrow is at the dot.
  • For balance and squat training use a high fall limit (suspension carrier arrow toward the upper mechanical limit in Figure 4). The patient can perform downwards movements (like squats) of up to 20 cm. Adjust it to a position where your patient can perform the activity while still being able to recover in case he falls.
Figure 4: High fall limit. Adequate for balance exercises and squats. Use the lift button to adjust the fall limit to the desired height.

Other Considerations

  • The fall limit will be asymmetric when applying asymmetric body weight support. Adjust the fall limit so the side that is closer to the lower limit is at your desired position.
  • When the upper limit is reached, the Andago will automatically switch to straight line mode. Once the suspension carriers are no longer at the upper limit, the Andago will switch back to the mode it was in.
  • If the patient often reaches the lower limit during gait, adjust the fall limit manually to a higher position by pressing the down arrow
  • Also check if you can help your patient by adjusting the BWS or by manually providing more trunk stability.
  • If the patient reaches the lower limit when turning or walking in a curved path, adjust the fall limit manually to a higher position. Give verbal and manual feedback to your patient to keep a stable trunk posture.
Q&A

How to Should I Optimize Body Weight Support for Andago Training?

Andago Body Weight Support (BWS) unloads a portion of the patient’s weight, thus decreasing the amount of weight they need to support themselves. This weight unloading is also dynamic in that it provides constant unloading despite any vertical movement during the gait cycle and therefore ensures the most physiological unloading and afferent input.

How Much Body Weight Support is Enough?

In general there are two things to check when applying body weight support:

  • Does the patient exhibit a stable standing position?
  • Is the patient’s knee extending correctly during stance phase?

If possible, talk to your patient and involve them in the decision of increasing or decreasing BWS. Below we offer some tips for BWS adjustment during training.

  • When adjusting the BWS symmetrically or asymmetrically, do it in small intervals (~5%) to ensure a level where the patient is able to accomplish the tasks while still being challenged. Providing too much BWS can produce changes in the gait pattern and hamper the patient’s ability to walk.
  • The total amount of unloading is the sum of both BWS modules.
  • Correct the fall limit (or to set it to the default value) after changing the BWS.

Things to Consider Before Adjusting Body Weight Support

Body weight support during overground training is a great way to help patients and with the Andago it can be adjusted during training by pausing the session and using the BWS button to increase or decrease the amount of unloading. However, too much BWS can be counterproductive and training can be improved by looking at other aspects before automatically reaching for the handheld.

  • Check if providing pelvis and trunk stability contributes to knee stability. If so, consider using therabands or other standard therapy material to provide stability at the pelvis. Also consider giving your patient trekking poles or your hands to avoid the patient using the handrails and to stimulate specific movements.
  • Check if specific verbal indications (“keep your leg as straight as possible”) helps the patient understand what is required. Place them in an everyday environment to facilitate the transfer of skills and give explicit feedback (e.g. “walk to the corner and collect the ball”).
  • Training in front of a mirror can also help the patient correct his posture and improve stability prior to gait training and gives the therapist a broader view of the patient while correcting some movements.
  • Check for muscle contractures in the hips, knees or feet that might be responsible for the knee flexion and treat them separately in addition to the Andago training.
  • Ask your patient to walk faster if possible to reduce stance time and therefore reduce demand on quadriceps. If this is not possible, start training static positions with the Andago and work on weight shifting and weight transfer from one leg to the other.

Should I use Symmetric or Asymmetric Body Weight Support?

Andago BWS can be applied symmetrically or asymmetrically in order to compensate differences in loading ability of the patient on both sides (e.g. for stroke patients). Increasing BWS unilaterally can help your patient by supporting pelvis stability and postural control.

  • Check the pelvis lateral tilt to identify if additional unloading is required on one side of the body.

Figure 1: In order to apply BWS asymmetrically, select the side on the handheld before adjusting the amount of unloading.


Clicking the symmetric unloading button after setting asymmetric BWS will distribute the total unloading symmetrically.

Example: if you unload the right side by 15 kg and the left side by 5 kg, clicking symmetric unloading button will set both sides 10 kg unloading.

VIDEO

Andago Instruction Video (Full)

English
English
German
French
Italian
VIDEO

Andago Instruction Video (Chapter 1 - Prepare the Patient and the Andago)

English
English
German
French
Italian
VIDEO

Andago Instruction Video (Chapter 2 - Set up the Patient)

English
English
German
French
Italian
VIDEO

Andago Instruction Video (Chapter 3 - Training)

English
English
German
French
Italian
VIDEO

Andago Instruction Video (Chapter 4 - Bring the Patient out of the Andago)

English
English
German
French
Italian
VIDEO

Andago Instruction Video (Safety Mechanisms)

English
English
German
French
Italian